First of all, though, thanks to all who care enough to pop over and say Hi. Things are very topsy turvy health wise this past month and look like being that way for a while. Sorry I wont perhaps be as active at returning comments,.
Dear Ones, well today is a day of great rejoicing as my title shares.
Can you imagine the great sorrow of the women and disciples upon the first day of the week?
They thought all was lost - Jesus was dead upon the cross of Cavalry, and buried in stone tomb!

3 And they entered in, and found not the body of the Lord Jesus.
4 And it came to pass, as they were much perplexed thereabout, behold, two men stood by them in shining garments:
5 And as they were afraid, and bowed down their faces to the earth, they said unto them, Why seek ye the living among the dead?
6 He is not here, but is risen: remember how he spake unto you when he was yet in Galilee,
7 Saying, The Son of man must be delivered into the hands of sinful men, and be crucified, and the third day rise again.
8 And they remembered his words," Luke 24:1-8 (emphases mine)

How rich we are in Jesus if we truly know Him as our own Saviour from sin and love and serve Him..
A hymn came to mind as I think upon today, Resurrection Sunday, and as verse 2 says the day of Hus appearing will come at last - one glorious day He’s coming back again! for He promised (John 14: 1-6)! I so look forward to His coming AGAIN!
It is I serve a Risen Saviour... may it bless your heart as it did mine.
I serve a Risen Saviour by A J Ackley
I serve a risen Saviour, He's in the world today;
I know that He is living, whatever men may say.
I see His hand of mercy, I hear His voice of cheer,
And just the time I need Him, He's always near.
Refrain:
He lives, He lives! Christ Jesus lives today!
He walks with me and talks with me along life's narrow way.
He lives, He lives, salvation to impart!
You ask me how I know He lives?
He lives within my heart!
2 In all the world around me I see His loving care;
And tho' my heart grows weary, I never will despair.
I know that He is leading thro' all the stormy blast;
The day of His appearing will come at last. [Refrain]
3 Rejoice, rejoice, O Christian, lift up your voice and sing
Eternal hallelujahs to Jesus Christ, the King!
The Hope of all who seek Him, the Help of all who find,
None other is so loving, so good and kind. [Refrain]
To Him alone be all the glory, honour and praise, with much thanksgiving for Resurrection day!
Shaz in Oz.x
Hymn sung below by Mennonite Youth choir link HERE if not showing
Now to some cards, as most of my cards are snippety, its always hard to pick a snippets card. The first one is the most snippety!

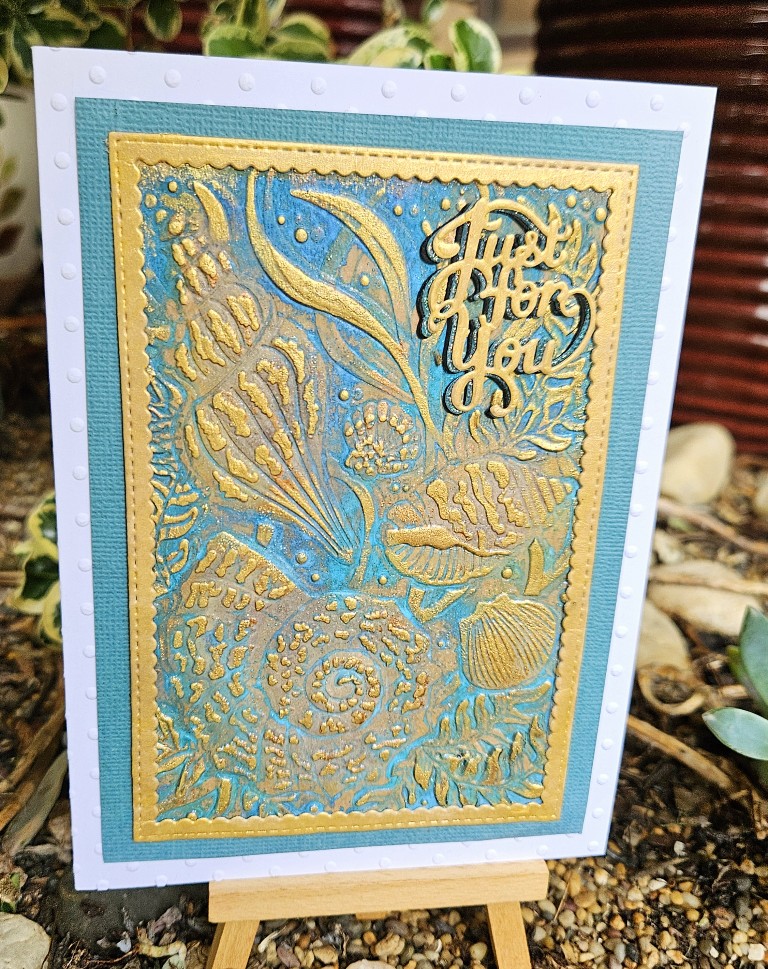
Recently saw it in "use it!" box desk. Thought, Mm, brayer the beautiful gold acrylic paint over the top, see what happened!? This is it!
The frame was already cut to right size! that's God's goodness! from a natural coloured cereal box, painted it with same gold acrylic paint. Verse was stamped & gold embossed ages ago, a wooden Stampendous stamp, a favourite verse of mine - "WITH God, ALL things are possible." Mtt 10:26 Frame is a Kaisercraft die. MB butterfly Pippi disc.
Links below to challenge.
Next card - is with vellum, I was given some Prima metallic accents paints for Feb birthday, I've really enjoyed making a lot of cards with them. Have many in wings which hope to share in months to come as health permits. The frame, punch butterflies (Kaisercraft large, small unknown) and back of embossed vellum were painted with these paints, the frame and one above are Scrapdragon brand, an Aust online company. CB embossing folder disc long ago. Again my favourite bible verse stamp. Used NBUS Prima Iridescent watercolour paints!

Two more cards, I made a number of these, with this NBUS flower stamp die set. This is an encouragement one with Hero Arts hugs and prayers.

The floral stamp set is disc., though a NBUS! as is mixed Oligagarch (sp?) greetings stamp die set, that was bought recently on Amazon!
No longer available! I think the EF on background is Altenew 3D folder from memory. Added light spatter in colours used to paint them, with a bit of the gold as well.
_copy_600x795.jpg) These are all NBUS so will pop over to Darnell's challenge.
These are all NBUS so will pop over to Darnell's challenge.
_copy_600x795.jpg)
Linking up to the following:
1. Snippets playground with green card here
2. NBUS Challenge here
3. Allsorts Challenge over here CAS or Anything Goes encouragement card is a favourite and it's CAS
4. I'd also like to link these cards over to this wonderful challenge- Word Art Wednesday- Anything goes http://wordartwednesday.blogspot.com/2024/03/anything-goes-weeks-641-642.html?m=1
.jpg)


.jpg)


_copy_1024x1024.jpg)
.jpeg)


