Thank you for taking time to visit, and I hope I am even a tiny bit helpful as I have been helped and blessed by so many others. I have been doing Calligraphy since teens, and card making for many years as well. In 1990 I delighted in the joys of stamping with ink and embossing after a trip to Cairns, Qld. In 2009 I discovered the brayer, 2010 the Cuttlebug, also have now taking to reading up on crafting blogs and lo! Here I am, on one of my own.

I live on the coast of eastern Australia. I am a Christian. I trusted in the LORD down here at the beach, amazingly it is not far from where I now live. It was over 50 years ago, after a Beach Mission Service at the age of 12 years

Showing posts with label Embossing. Show all posts

Wednesday, 29 June 2022

Galaxy with Alcohol ink on Foiled card - WOYWW

WARNING! photo overload ahead! 😊

 Well, just over 2 mth since last post - I think this a record silence from blogging for me! I am creating but blogging time is scarce, nevertheless a glimpse of many cards made and techniques explored.

 Desky share for WOYWW - What is On Your Workdesk Wednesday, over HERE 😁 at Julia's … today is full of 2 months of inky fun. This desk is continuing the previous post's techniques with Alcohol Inks and Foiled card.

A foiled cardstock with galaxy sky look, made by embossing silver foiled card (CB Clockworks folder disc.) then layering alcohol twice, ie first layer not enough depth so repeated double layers of alcohol ink. It was a great learning curve. Key addition was metal mixative of copper, as it layered over it a coppery effect in light, photos don't capture really it.
The images  are Beccy's Place, Nuts & Bolts Bot set disc. Coloured around edge with black fineliner to easier cutting, used greetings on set. Colours closest to first and last photos. I used a fine liner black to thicken edge of image to make cutting out easy, see below.
Next  are AI on embossed foil - ladies birthday cards shown on desk in post below - different colours, but similar, PB die on right (disc.) and MB die on left added, EF Sizzix 3D, recipe below post.
TIP - ordinary alcohol laid down first, added colour and move colour about by tilting, add more colour or alcohol carefully not too much of it, as is needed.
I like to cover it all, most of time, but sometimes looks good with space..
 
A Sympathy card using MB Poppy die, the Numbers Stampendous verse I love, with gorgeous snippet of Washi for DP again!
 
Iris’ 90th is made with Spellbinders Iris die - this was a labour of love.
It had stringent overseas mail size restrictions, couldn't be fully 3D, very difficult. The colour more purple than plum, but unable to capture that, again!

Two male birthdays of Black ice - see here(see last post for link or just search it will come up). These are done with Stampscapes, involve multiple stampings, very tricky to be honest. I redid some by cleaning off with alcohol spray a few time just wipe and start again! July one still on way to Norway, other Aussie for June.
This was a totally new technique seen on this video by Marianne Emmerson - here an embossing powder pounce technique!
A learning curve - hard to photograph but much fun. A 60th, but photographed before added 60, die cut birthday greeting is embossed in copper EP used on card, dragonfly a NBUS, forgotten name sorry.. 
(Might have bought some more embossing powders to try some ladies cards😉
Below are powders used, not new but some quite old.

TIPS: the addition of the Stampendous Shaved Ice was brilliant, made it iridescent, esp on green EP. 
Keep moving the gun around in pouncing -> fine doing it on heat proof surface, used "Glad Bake" paper, for Aussies.

Last card is most recent, for a nephew, wanted change from Black Ice so finally used this Snoopy's Convertible stamp by Stampabilities.

Used a new Mask too, my bargain spider web one marked to $2. DP is surprisingly same set as the black ice cards, & by SU five years ago. Real colour is closest to bottom image, very sunny washed out top image.
 
Now  am working on a small Calligraphy for present... then August birthdays - and somewhere some Christmas cards, as waaaaa-y behind there!

Next are the Aussie pickies - for those of you sweltering, we've an unusually cold winter Downunder! This Nandina out the front under the house eaves is our weather barometer for how cold it gets. More autumnal colour the more cold it’s been - lots more this year!

As near sea, frosts are rare but still very cold! Hat on with fingerless gloves at night… inside 😂😂😂

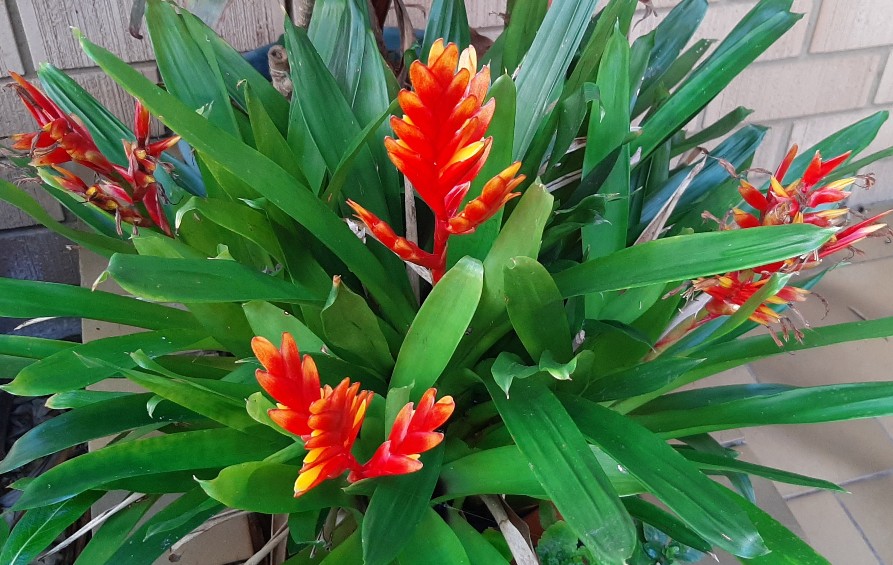
  A Brommeliad by front door, love the flowers on this one.

         Chrysanthemums, yellow are always late.. end of May, after our Mothers day in early May. Loved this year's rain then dry.

Sunsets are always a beautiful end to a sunny winter's day..

Last is obligatory seascape - know they're loved! I love it too, so did mum and dad.. this is such a "dad painting"!


How am I? simple answer is up and down - often not great with some good patches. 
That is in part why I'm not blogging much, but also since Covid I am more in prayer, and visit folk more often, as more need it - when able! 
Australia has been very strict in mandates, etc (in my opinion, too much). I don't consider us a democracy, but now more of a bureaucracy, run by “health” bureaucrats. It makes me sad, so pray more. Not as bad here tho’, as in Vic, Qld and WA. 

Thanks so much for popping over - I really appreciate it so much! I will visit as many as I can, but iPad now blocks all bloggers except those with pop up windows comment boxes.

 (EDIT: Sad, more than half of WOYWWers, I cannot comment on. iPad will not comment - a few are non blogger website. Mostly are bloggers with embedded comment boxes, which crazily is bloggers “default setting”! I apologise, really, I read post. I’ve actually written to blogger ages ago about it, no reply .. like my comment attempts.

I EXPLAIN HOW TO CHANGE EMBEDDED comment box - on the top of this blog post here, would be so very grateful if fixed, I’m not only one struggling.)

May God bless you and all whom you love, Shaz in Oz.x

PS the crafty WOYWW crop in Nov sounds wonderful.. happy memories of Llandudno in Sept., 2018, so blessed to share with you all. Enjoy! Might see if can zoom now have it on iPad. 😆😂ðŸĪŠðŸ˜❤️

Thought for the Day


This is not a verse - but it is so apt, and in many verses! 

It is easy to forget there in One Who is watching over us and only ever a prayer away! if God seems a long way off - He hasn't moved - I have!

If we come simply as a little child, our Heavenly Father hears the softest cry!


Joining up to:
1. Word art Wednesday Anything goes! http://wordartwednesday.blogspot.com/ 
2. Snippets playground is Iris' 90th, snippets are all but base and mauve plain cardstock. All rest are snippets right down to oval scallop made with a cracker packet coloured with inks, as did on other parts of flowers ribbon etc. - https://pixiessnippetsplayground.blogspot.com/
3. Joining with the NBUS Challenge .. three NBUS - Never Before used Schtuff https://mynbus.blogspot.com/2022/06/nbus-challenge-39.html last Snoopy card and Iris card too both are NBUS. Oh and first card is too as brand new stamp set .. wow!
4. Allsorts Challenge blog - so girly - http://allsortschallenge.blogspot.com/
The two Alcohol birthday and encouragement card, plus Iris card, and Washi paper card..
5. Beccys place June challenge the Bots images https://beccysplace.blogspot.com/2022/06/june-challenge.html 

Wednesday, 29 August 2018

Stencils Oxides Inky Embossing + WOYWW

Hi everyone.
Glad to be sharing today's crafty desk at WOYWW over at Julia's Stamping Ground. 
For those of you who are regulars to this blog, and wondering what's been happening please read this Post over here on vale Mike in Oz.
A quick post because I've been crafting with a very dear friend.. how wonderful!!
 Using Oxides here blending on top layer of EF for gentle shading underneath then loads of smooshing ink on top as well for real dimensional pop!
Then below is a stencil with blending of Oxides for a wonderfully fun background.
 Loved this result .. stencils and inks all supplies are my friend Anne's..  so can't give details sorry!
Rubbing wax on triple embossed craft cardstock.
The oxides were great on gold cardstock here too!! More wet amd dry embossing.
Finished result certainly worth it! Used silver rubbing wax on dragonfly.
Finished Desk. The plain brown check were simple dry wet embossing combo. Inked up top side of folder and emboss really well with number of passes through cuttlebug to give more dimension.
Card made with Washi tape, peel offs and scored lines. China H.B. die is triple cut in red gold and top layer is washi, all slightly offset for a shadow effect.
A tranquil photo from springtime Oz today after an afternoon's walk. Note wattle flowers in foreground.
Thank you to all who pop over and say hi. 
You really do bless my heart. 
I pray God may bless yours, also. 
Prayer hugs, Shaz in Oz.x
A favourite verse in times of trouble but also good for every single day of our lives . 
A proverb to live by, for us all:

"The name of the LORD is a strong tower: the righteous runneth into it, and is safe."
Proverbs 18:10
Linking also over to:
1. Snippets Playground. Happy Birthday card is snippets
2. Word Art Wednesday

Wednesday, 15 November 2017

Bizzy Becs DT - Wet + Dry Embossing Background Dies

 Hullo there everyone! Another DT post for Bizzy Bec's, few cards with a newish technique used back here! A big peek..
 
Using from Bizzy Becs:
Frantic Stamper Sanharan Screen Background Die
STEP BY STEP:
Cut piece of card coloured or white card of good weight, to fit die for background piece. As you'll see I used two different background dies here.
 Use anti static pad on card first, ink it up lightly with Versamark ink pad

TIP: Put versamark on cutting surface *only, so just dust *gently across the top of the die.
**avoid as much as possible pressing into the crevices of the die pattern.
If you do, you'll need to remove lots of excess powder from wrong place. 
(Wonder why I know)

After inking, work out embossing sandwich for your machine, I used a very thin shim on my machine, instead of thicker usual shim.
Place cardstock on rubber mat, gently lower die, cutting side down on cardstock and run through once. I found once with thinner shim sufficient on my machine.
Dust well with EP of choice, remove unwanted areas with fine paint brush (much less on my third attempt) and heat set.
 If not quite enough embossing, you can carefully repeat, I did on one of mine, and it worked well. Just line up carefully.
The other background die used. First time used, I put in centre pieces of Sue Wilson die. But left it plainer on third card, thought it looked better, less is more.
Use a fine brush to remove excess powder.
  Choose simple overlay of design on top, these Elizabeth Craft Design Quietfire dies are simply perfect.
 Die cut the greeting three times with backing double sided paper on the back.
 Leave greeting in base card and layer the intricate top layers into placed whilst still not separated (see photos). Makes it much easier!
 Loved both these variations, it would look great on deep burgundy cardstock too or green for a Christmas card background.
 Sue Wilson die with and without centre.
 Thanks for patience in reading this long post.
Now dont forget to pop over  HERE at Bizzy Bec's and please do join in ANYTHING GOES November CHALLENGE - to win that monthly prize (posted overseas too!).
Pop by Bec's store, too, for her great bargain prices
.


Thanks so much every one for popping over for a peek and chat!

May God bless your day wherever you may be. 
  Will do my very best in commenting, and truly appreciate your visits!


Shaz in Oz.x 

"And thou shalt love the Lord thy God with all thy heart, and with all thy soul, and with all thy mind, and with all thy strength: this is the first commandment." Mark 12:30
  Linking up to:
 1. Word Art Wednesday - anything goes, both cards   http://wordartwednesday.blogspot.com.au   
2. Di's Snippety challenge - Used snippets, die cuts http://pixiescraftyworkshop.blogspot.com.au/

3. http://www.simonsaysstampblog.com/wednesdaychallenge/simon-says-snow-white/ could add snow to your project or use a lot of white on your creation.
 

Wednesday, 30 August 2017

Use Stencil as Embossing Folder + WOYWW + Mo's Christmas Challenge

Well, I made this card for Scrappy Mo's Christmas Card challenge aka Rudolph days on 25th of this month. Finally getting around to blogging!
Yup! been very busy. 
As it is Wednesday, I've also a desky share - or What is On Your workdesk Wednesday.. pop over to our Julia's desk for the link up, at Stamping Ground!  although current desk is missing - submerged! Totally.
So sharing how I embossed my stencil to get look I wanted.
My seven year old bug in action here.
Sandwich is: B plate, a shim (shim = 2 layers of cereal box card), rubber embossing mat, cardstock, (light 160gsm), *stencil taped down (first one moved, cos didn't tape down), other B plate on top. Whatever embossing sandwich you usually use should be right.
Lovely - just what I wanted. Stencil is Stars one by Memory Box. Seen it still on eBay but maybe disc.?
The regular visitors will recognise my die from last week. Wanted to make this card - the plan was to batch make, but no, not done. Which is shame as already want to remake this card, will do in time. Using Golden Glitz by Delicata to sponge over whilst stencil is still attached. Yummo!
.. thinking about layout.. had this digi verse by Karen Murray's Christmas set from Etsy in mind (does verses on WAW, too, for free). Should have turned card on side but for some reason didn't think of it at this stage. Little star from centre of this die fitted star on her verse perfectly. Layered up star, 2 white layers + gold card. Do love dimension! Finished card is below with close up, too!


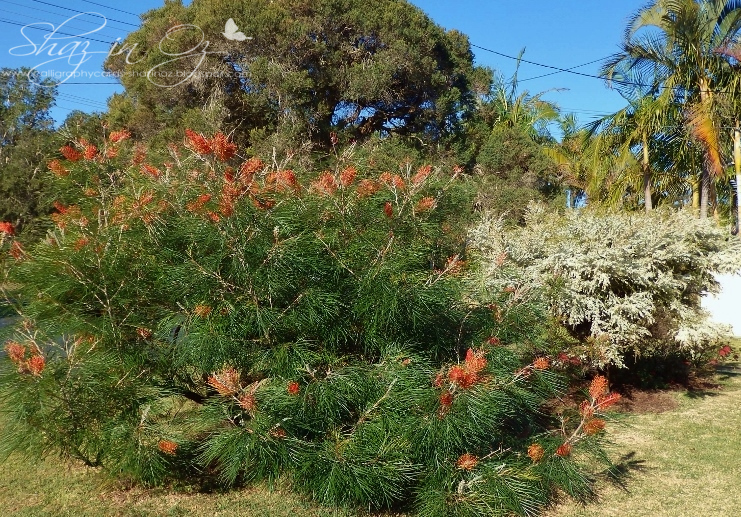
 To the Aussie shots! our garden at the moment is a picture spring is really coming, but oh! we need some rain. Had 1.5mm this month, 10.5mm last month, July. You can see the grass is looking dry. Don't water it, but do water plants - the roses are bursting out the back yard! This is the orange Birdsong Grevillea, which birds do love, and white leptospernum, or tea tree common name.
Birdsong was almost decimated in a wild storm last June, 2016, thought it might die, so prayer was made ... It has bountifully sprung back to life... a picture of God's regeneration work after pruning and regrowth appears a lot in spring. Good and needful also in our lives but hard. These storms do draw us closer to Him though, so make it worth in the long run!

Thanks so much every one for popping over for a peek and chat! 
May God bless your day wherever you may be. 
  Will do my very best in commenting, and truly appreciate your visits more than words can say. (as it is now nearly 10pm here wont get it done tonight - tomorrow is more appointments, including dentist, and craft shop - meybbe! :D)
Shaz in Oz.x
Life feels like a storm at times ...but we are never, ever alone. 
.." the Lord hath His way in the whirlwind and in the storm, and the clouds are the dust of His feet.
 The Lord is good, a strong hold in the day of trouble; and He knoweth them that trust in Him." Nahum 1:3b, 7 
Related Posts Plugin for WordPress, Blogger...