Thank you for taking time to visit, and I hope I am even a tiny bit helpful as I have been helped and blessed by so many others. I have been doing Calligraphy since teens, and card making for many years as well. In 1990 I delighted in the joys of stamping with ink and embossing after a trip to Cairns, Qld. In 2009 I discovered the brayer, 2010 the Cuttlebug, also have now taking to reading up on crafting blogs and lo! Here I am, on one of my own.

I live on the coast of eastern Australia. I am a Christian. I trusted in the LORD down here at the beach, amazingly it is not far from where I now live. It was over 50 years ago, after a Beach Mission Service at the age of 12 years

Showing posts with label Glimmer Mist/Cosmic Shimmer. Show all posts

Friday, 15 July 2016

Shaker Card + Elizabeth Crafts Happy Birthday die Bizzy Bec's DT post + Friday Smiles

(WOYWW post down below or click here)

Hullo there everyone, time again for a mid month post for my DT over at Bizzy Bec's.. and those of you who know me, know I often do a tutorial.
Today - shaker cards using positive and negative of a word die - a happy birthday die!
You get two cards for the price of one!
The Elizabeth crafts Happy Birthday word die, a stunning die, very easy to use positive and negative.  Also using the Cottage Cutz Stitched ovals.

Step 1 die cut out the centre of the shaker card with die cut of choice. On underside add the acetate for the shaker bits to go under. I put on the top of it (but not essential) a frame from same size oval and next one up and mount with double sided mounting tape, cut to size and pop it up on the outside. see below.
Step 2 the completed front part of the card, ready with acetate, frame and embossed front sheet.
Step 3: Here's a snippet of inky photo paper, made with Distress Ink pads (Mustard seed, Spiced marmalade pads, SU Lively lavender + Peeled paint re-inkers) and damp crumpled cling wrap method. Gloss card is smooched with random inks, damped scrunched cling wrap is laid over it to dry. 
Add double sided tape to back of piece for word die. Cut the word die. 
Step 4: Added the sheet of photo paper to a snippet of white card, after cutting it, peeling off the positive of the word die to expose the intact negative of the die on lower layer.
I have cut another word die cut out of white craft foam (adding double sided tape on the back of it also), for the happy birthday die.
Lay the positive layer on top of foam cut so it pops up nicely on the card.
Step 5: I decided I needed to match the colours of the die cut with the background for shaker, so really mixed media here! Some torn up tissue paper, glued on scrap of card, coloured with similar toned sprays.
Step 6: Here are all the shaker elements in the inside of the foam layer, it was die cut with inside size die, then adhered with tape + non tacky glue to the back. I say non-tacky cos tacky glue can stick to sequins, etc.
Step 7. Add seal on back of shaker, I used some anti static powder on back of the acetate. The seal on back of foam needs to be complete before turning it over.

Completed card 1, also used embossing folder by *Taylored Expressions called Snow fall, *available from Bec.- although not on site. I actually embossed it from both ends to extend the embossing.
Card 2: You probably cant see it but used Spellbinder Pierced Rectangles die set to cut out the photo paper. Just used the pierced section to give a pierced edge. Two snippets of green used here,  folder is a 5 x 7" Cuttlebug one called Dominoes.
May God bless your day, every one - wherever you may be!
Thanks so much for popping over for a peek and chat.. will return your visits as soon as able, as am bit behind .. sorry!

Shaz in Oz.x
And they that know thy name will put their trust in thee: Psalm 9:10

'Cos it is Friday over at Annie's! here are some Friday smiles.
My sister and hubby are in South Australia on a four drive trip here and the driver took these amazing shots not bad eh? Magnificent birds of Gods creation, Aussie Wedged Tail eagles! soaring ever so high .... Oh, and dont argue with those talons.


Also linking up to:
1. Di's Snippety challenge - Used snippets on both cards.   http://pixiescraftyworkshop.blogspot.com.au/ 
2.Word Art Wednesday - anything goes     

Tuesday, 5 April 2016

Bizzy Bec's April Challenge - Darkroom Door Butterfly

 Sticky post - please scroll down for WOYWW + latest posts... thank you.
or click here..

Hullo there everyone - well another blog post for the
Design Team of Bizzy Bec's - Aussie Crafty Website Store! 

Bec has amazing prices on all your crafty needs!
If you cant find what you want, Bec is only too happy to source it for you.

 Each month we have a Store blog challenge, Anything Goes! 
Please join us do - prize posted world wide!
Anything Goes! and the winner of each months challenge, will receive a Mystery Prize - being a die or stamp.
 Will share how my card is made it step by step.
 For those who don't want all the details - then just look at the pickies :D

Took a piece of water colour paper, and some watercolour markers in this case Tombow markers - bought in 1990's and still going strong. Wet it thoroughly with misted water to let colours blend. allow to dry well before using embossing buddy (how to make one here) and inked stamp as per recipe below. (Used yellows because the lady who I was making this for fav colour is yellow!! Green used, which wasn't tombow didn't blend, so did another sheet without the green)

Finished card - used the following items:
Clear Embossing Powder and snippets of cardboard.

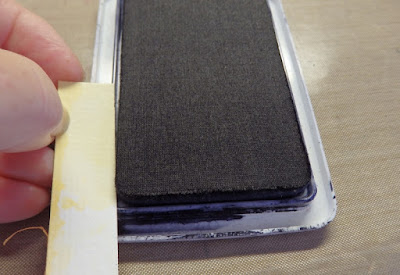
I edged the yellow base with black ink to make it pop more - to get a fine edge on your piece of card, hold it at a slight angle and slide along the edge of the pad.
TAKE CARE not to smudge the ink till it is dry around the edge (wonder how I know?).

Also made some bookmarks to go with this card .. the pippi butterfly die was used here. Not actually in list but Bec is able to source it for you... or check link there are some similar ones there too.
I have made two other cards with this Butterfly stamp - you can see how versatile it is! please click on links for how they're made :D
Recipe - details here
 

Thanks so much every one for popping voter for a peek and chat!
May God bless your day wherever you may be. 
Shaz in Oz.x

"But Jesus beheld them, and said unto them, With men this is impossible; but with God all things are possible." Matthew 19:26

Linking up to: 
 1. Word Art Wednesday - anything goes    http://wordartwednesday.blogspot.com.au
2. Di's Snippety challenge - Used snippets, on image and die cut.  http://pixiescraftyworkshop.blogspot.com.au/
3.  Stamping Sensations - April - One for the girls.  Butterflies

Monday, 4 April 2016

Darkroom Door Butterfly Post Stamp - Butterfly Challenge

Well time has flown, been quiet online but not at home busy visitors, commitments, etc going on!.. and trying to slip in for the Butterfly challenge #51 Butterflies + M is for Margins and/or Mint.
Mm, think this time might have done both in one hit! YAY!  
Mind you, I finished this card the day after the challenge came out (taken nearly two weeks to post it!).
This card was started on this desk here
 Here I was thinking would have plain background but Mrs A.'s very brainy combo made me change it! Mint margins - looks heaps better.
 This card is made with Darkroom Door Collage Butterfly Post stamp, inked in black Ranger Perfect Medium, then added Perfect Pearls/ Cosmic Shimmers in mint green, chocolate, and teal blue. Sheen is sadly lost in photo. Used Wink of Stella to highlight butterflies. The folder on base was extended by one notch (see how to extend die here), with SB A2 Polka Dots largest die.
Coloured the mint with three sprays - Deep green Cosmic shimmer spray (dont like them they always, always, always clog - no matter what you do, tried all the tips), soft blue and diamond dust glimmer mist. Combo worked a treat.
Can see some of glimmer in this one but still not much.
 To close with your Aussie shot of the day.. taken when dad and I went for our "Sunday icecream and look at the beach" drive.
Our skies are so lovely in autumn.. the sky late this afternoon when went for walk was truly breathtaking, and the water so incredibly clear, clean and blue - so very blessed of God to live where I live.

Well, I'm delighted to welcome a new wonderful encourager..... so do pop over to her blog and give some encouragement! Welcome to Berina of Rudolph Challenge GDT fame at Moxie Crafts.

Thanks so much everyone for popping over for a peek and please stay and chat.. May the LORD God bless your day, wherever you may be!

Shaz in Oz.x 

 "Hereby perceive we the love of God, because He laid down his life for us:" 1 John 3:16a

 Joining up with:

1. Word Art Wednesday - anything goes    http://wordartwednesday.blogspot.com.au 

Friday, 22 February 2013

Brayer with Plastic Wrap, aka Baraba Gray! Oriental Butterfly Swap

 Hullo everyone - well some inky mess here today! Oo YUM!
Quite a few weeks back here, Maggie Silvercrafter, was talking of Barbara Gray's method of Brayer Ink with Cling wrap, and she kindly sent the summary of it to me - so here is my take on it!! I have also found out from Arty Andrea on WOYWW there is Create and Craft TV Classroom which you can watch and here is the post with this method on it:
http://www.createandcraft.tv/in-the-classroom-lesson-10.aspx
You need good quality Gloss card like Glosskote or SU Glossy card, brayer and good brayer alcohol ink eg Adirondack etc (and it does not need perfect brayering as you can see below).
Step 1: I brayered on some Big and Juicy Hydangrea -colours from either end
Step 2: Spritz with tad of Diamond Dust Glimmer mist - not added on Barbara's design.
Step 3: Take a length of cling or plastic wrap, crumple up, uncrumple - spray inside of plastic wrap with light water spray, crinkle again. Then roughly untangle it and stretch it out wet side down. Lay over the shiny brayered card, pressing to desired shape.
Step 4: When happy with pattern leave them aside to dry overnight or however long it takes.
Once inky cardstock underneath is dry, remove plastic cling wrap to reveal the surprise, oooh!

Step 5: Hey presto! all different sorts of sheets some of them I used glimmermist and some did not - and like both. {Frugal me, saved the cling wrap for future use, and have used it again when ran out of the colured card}
Made four  of these the same, for Butterfly Swap with OSA (Oriental Stamp Art).
Here it is made up with some lovely washi paper bought with in Manchester at Paperchase (thanks Neet). Stamped in Ranger Archival Jet black with Art Neko Stamps - Shaft of Grain - this gorgeous, finely detailed stamp is on sale $1! and the Signature Chop, on sale too. Added the three wee butterflies from "Wildflower Sprigs" by Stampendous (clear stamps), with a Spellbinder Butterfly in same card stock, and inked up with black with in embossed die. These were made, and photographed about two weeks ago before event in PS below.
Well, thanks so much everyone for popping over for peek and chat.. and may God bless your day wherever you may be..  Shaz in Oz.x

P.S. For those wondering about that problem tooth it is G.O.N.E, after five infections :)
 I am currently recovering from the troublesome thing. 
Thanks so much for all your prayers. I know it was miracle when was seeing the Dental surgeon one day, and having it out the next with day surgery - usually have to wait months for such things!! God is merciful indeed. 
Thank you SO much, dear kind bloggers in blogland, for your kind thoughts and most of all your prayers.
I would like to enter this card in the following challenges:
Frosted Designs; Be bold. (Bold colours & patterns - Thurs 28/2)
Oldie but a Goodie. Bright colour (Wednesday 5/3)
Alphabet Challenge: Anything with Wings (Friday 1/3)
All Sorts: Things with wings. (Sat 23/2)
Created with Love: Things that Fly. ( Mon 25th)    

Tuesday, 28 August 2012

ATC's made for WOYWW folk - yes, about time I showed you!

Hullo there dear patient folk in blogland!
I am sorry have not been blogging much as I have been sick with tooth infection again; on double antibiotics for two days before it took affect and now on the tail end of second lot of them.
They are great, but it does make you feel peaky. I have to have it out by day surgery later in the year as it is an awkward extraction.

Finally here are my first ever ATC's (Artist trading cards, and measure 2.5" x 3.5" in case you did not know what they are, as I was puzzled as to what they were some time back! ).
 I have made them for folk in WOYWW - when we had the 3rd anniversary at the end of May, 2012.
I was away when it was all announced and made it home just when it was due. Some kind folk still offered to send me one and waited patiently till I made mine and sent them off to them..
I took a while to make these as I really struggled with them. 
I had never made an atc before and really found them hard... maybe I wanted to make them too complicated...anyway dont think I will ever fall in love with the format.
First one I made for Jo (Twiglet) in exchange for her gorgeous dumfling, and made with Stampin up stamp set (Oriental) on sponged background. 
The second was made for Neet, was using a piece of  multiple layers of EP and stamp work originally made and explained back here.

Third one was for Bridget from Oz, and I made it with a scrap piece of card I had inked up with left over ink and glimmer mists  - had sprayed onto a craft mat and rubbed the card in it to get the mottled effect then stamped with a Penny Black stamp.

This last one is for Bella in South Africa and made with Stampscapes..(see her's here). It is a scrap piece again but brayered and then stamped and mounted with two mini tags with Stampin Up punch and stamp set.
I think I like it best but maybe that is because I love Stampscapes so much... think you either like them or you dont!
Okay I have been not to beach much lately but here are a couple of photos taken with my **mobile phone camera two weeks ago when my brother was visiting. (**For those of you who may not know all my beach shots are taken on it as rarely have my camera.)
I love the crab eggs as we used to call these when we were kids on this beach - they are of course the neat balls from crab excavations of the holes - at low tide.. 
We used to try not to tread on them because we really thought they were crab eggs!! and then here are a couple of views on our walk..
A sandcastle and two windsurfers in distance waiting for the wind to come up - but it did not..and yes, we have had days like this for all of August, smashing "winter" weather, it will be about low twenties today.
 As this post is concerned with WOYWW  and some folk may not know what it is; it a weekly blog hop called What is On Your Workdesk Wednesday and most kindly hosted each week by the instigator of this world wide blog hop, our Julia of Julia's Stamping Ground!
 Not much happening on my desk, just some new LOTV cards, mostly for Christmas toppers as they had free post at the mo, even to Oz - always a draw card - check them out here! 
And still not unclogged the glimmer mists and cosmic shimmer but was told by Joanna Sheen they are meant to be laid down for starters so did that (top right)! I have not finished the Stampscapes card (left) begun on post below yet, but it is one step further along.

Thanks everyone for popping over for a peek and a chat and may our dear Lord bless your day wherever you may be!
Shaz in Oz.x

Wednesday, 15 August 2012

WOYWW Stampscapes + Clogged Glimmermist????

 Hullo there everyone - sorry things have been a bit quiet but you know how it is! I have been silent as had doctor's visit down in Sydney last week and rejoicing over improvement in results,  yay! thanks LORD! :D
Here on my desk today... mm bit messy.  Supervisors in attendance  - they actually do live here but move around a bit of course!! 
 You can see some sprays of glimmermist, Cosmic shimmer mist, etc. to the right. These have become clogged up because I did not read the fine print about washing them after use to prevent clogging!!
DER!!! now I am wondering what to use to unclog them...was thinking of cleaning spray head with methylated spirits - or should I start with warm soapy water??
A new addition to left of my desk! Another "hand me down" from my sister for my new room - how cool is that? things to be sorted but great storage and height wise next to my desk.

 Also on desk are some brayer snippets decided to make into cards - you see I tend to do a number at once when playing then make them up later. I was looking at the Stampscapes one when came up with this idea.
With this one I wanted to make a square, with a border edge around it. All my dies were a fraction too small and I was loathe to cut the picture down.
Then I thought, why not cut the die to pieces? {Addendum - some folks seems to think I cut the die up- I did not! I cut the die-cut of black card  to pieces :D not the actual die.}
 This the beauty of this die, Spellbinders Fleur de Lis square, it lends it self to this exactly - see ... none of the pattern is lost. This would make very good corners for a larger card or if you want smaller corners, just use one of the smaller dies.

Anyway Julia, head teacher of WOYWW (oh yes, WE ARE looking at desks folks, cos it IS: "What  Is On Your Workdesk Wednesday?") will be proud of my brevity. Do pop over to her fantastic blog and join us today!
Thanks so much for popping over for a peek an a chat. May God bless your day wherever you may be!
Shaz in Oz.x

Monday, 25 June 2012

Teabag Folding Music Cardlayer - Cardmaking Online DT Project

Hullo there everyone, let me share with you some new teabag folding cards made for Cardmaking Online Blog - it would be lovely if you would also kindly take the time to pop over to our blog - or even stop and say hi! :D {actually if you do go over would you please let me know if they have word verification on p;ease as Sandra from Stamping with Pleasure said they did and would like to know, as its not on when I comment - thanks!}
 These make really good male cards, which are not always easy to decide on.

 1. The tea bag folding papers have two sizes in the squares. Take eight small ones of the Golden Music teabag  folder paper, carefully cut eight small squares and fold in the traditional star pattern (see here for a good guide). 
2. Paste it all together in the layer pattern you would like best. There are four star patterns formed with this particular folding paper. Each view is different - I liked this one best.  I use glue stick with tea bag folding, as find this least messy.
3. Cut a circle from co-ordinating colour scrap card to match the size of the teabag with Nestabilities Classic Scallop Circle Small S4-125 . Then cut a black scallop with corresponding size die with Nestabilities Classic Scallop Circle Small S4-125,  and emboss both of these with the tan mat  and embossing machine.
4. Mount teabag on top of circle with double sided (DST) tape.  Add scalloped mount + teabag with DST to cardlayer. Cut brown card to size and adhere to the cardlayer.
5.Use brads at the top to match brown card and a black ribbon at the bottom of the card layer. . Attach black card base to finished top section of card to it. To finish add a gold Happy Birthday peel off greeting to top right corner.
  Items used
.
Also available in this  teabag folding paper is the Music Blues Tea Bag Folding Paper,  and here is another variation with same card design.

  1. Using this time the large teabag pattern on the sheet cut out four squares fold as before in card above. Then  when you come to step 4 of the folding, take it the extra folds as shown bringing the top two triangles in to along in the centre (step 5). Bring the tips down to meet with the top and pinch them open (step 6).
  2. When you have the four completed pieces, paste them to a scrap piece of card. Trim it in the shape of a square so none of the base card is showing (5 x5 cm). Attach a pearl brad to centre.

3.Then take another of the Luxury Card Layer A6 - Ivory Music Notes and spray with a suitable spray.
Used is a blue mist and silver mixed together to get this colour (eg Perfect Pearls Mist - Perfect Pearl and Perfect Pearls Mist - Forever Blue 60ml. 
Allow to dry.

TIP: Then to flatten the card layer after spray has dried, use a DRY (not steam setting) iron, and iron it between two sheets of Non Stick Oven bake paper (not waxed paper) with a standard iron on low temperature. Not many of us have a craft iron, but most of us have the non stick paper in the kitchen, and a regular iron. You need to use it dry though as steam affects it.
4. Then mount the coloured music layer on some deep blue card to match the size of the card you want to make, and also attach to black card base with double sided tape (DST).
 
with permanent black and blue textas (as shown in the post here).  
6.Attach the mounted square teabag with DST to the lower right of the music cardlayer and then add the greeting to the top right at suitable angles.
Added also were some small black rhinestones in the corners of the cardlayer.
And another lovely teabag card is completed.
Items Used:
Thanks so much everyone for stopping by for a peek and a chat...and may God bless your day wherever you may be,
Shaz in Oz.x
PS for those for those of you keen to try this out for your selves this is a really great video here.

Wednesday, 4 May 2011

WOYWW - What's On Your Workdesk? Wednesday 100

Today is another WOYWW and number 100 … Mind you I have not been here for the 100 of them! I did not even know what a blog was when this all begun. Only discovered blogging just over 12 months ago... 
 Here is the latest update on the text of Ephesians 4 verse 32, still not finished but on the homeward run now. I work in mostly gouache (which I mix on the messy piece of card to the right of the screen - have used this piece for about ten years!). I also use some watercolours as you can see and to make sure I get the blending and colouring right I use a clip on magnifier glass (bottom right). I found this gem at Aldi and love it. I have done most of the colours and using the tabernacle colours here of blue purple crimson and gold.
These were the colours used in the OT when making the tabernacle and in the 1950's book ("Illuminated Texts and How To make Them" by C Willis & G Houghton) I used to learn my illuminated work they give the meaning as described. The top line blue is showing the work of the Spirit (Be ye kind) as the blues shows the Spirit, the  purple and Gold shows God’s deity and God the Father, and the crimson shows the blood and the Son of God so used the crimson for the last line and purple/gold for the middle line referring to God. I pray much about layout and colours. I have yet to put in the rest of the colours on the vine-work and apply the gold leaf. And yes! By God’s grace it will be finished in time for our mother’s day this Sunday (not my mother but a friend ordered it).

I have a new monkey Mrs A.! Here is my latest visitor from the UK - my family were over this week past (boo hoo! heading back today!) and they brought me a pressie of a "Deer" monkey (he has a reindeer jumper) as I have called him, here are the two of them!! And aren’t they just the cutest? they now ride around together in my car and they think it is nice to have playmates!


A quick card I did end of last week…I brayered Hydrangea Big Juicy pad with the lovely Leaves & Butterflies K Kingdom Embossing folder 129 from  Fat Cats Card Corner , put it through bug and the sprayed with Diamond dust Glimmer Mist, cut out oval and scallop oval in Magenta pink Mirri cardstock. Mounted on pale pink cardstock and adorned with Marianne Creatables Cutting Dies Butterflies in matching Mirri card and used Orchid craft Roses and pins for extras…oh and forgot! I used the Nellie Snellen border lace doiley die as well on the bottom!

Happy WOYWW everyone and do pop over to Julia’s blog, Julia's Stamping Ground! for the best blog hop around! 

Apologies now if I run late with my comments hop as must simply finish this text first but will get there if a little late!!
Related Posts Plugin for WordPress, Blogger...