Thank you for taking time to visit, and I hope I am even a tiny bit helpful as I have been helped and blessed by so many others. I have been doing Calligraphy since teens, and card making for many years as well. In 1990 I delighted in the joys of stamping with ink and embossing after a trip to Cairns, Qld. In 2009 I discovered the brayer, 2010 the Cuttlebug, also have now taking to reading up on crafting blogs and lo! Here I am, on one of my own.

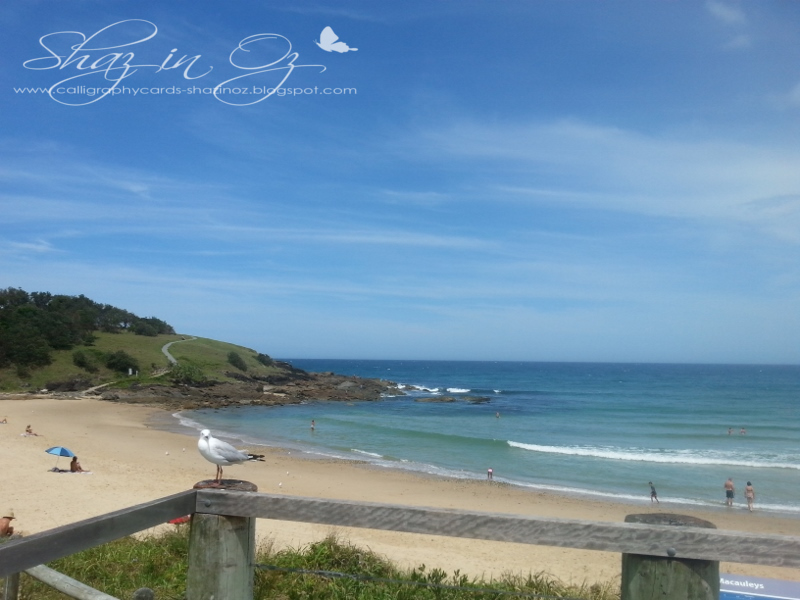
I live on the coast of eastern Australia. I am a Christian. I trusted in the LORD down here at the beach, amazingly it is not far from where I now live. It was over 50 years ago, after a Beach Mission Service at the age of 12 years

Showing posts with label Enlarging Cuttlebug folders. Show all posts

Sunday, 15 January 2017

Darkroom Door Surfboards Stamp - Bizzy Becs DT

Hi there everyone, where does time go? Now the 15th, so halfway through month - that means a Design Team post. 😊
Today I'm sharing another card with a Darkroom Door Surfboard Photo Stamp .. do love these great red etched cling foam mounted stamp. May use them in stamping tools like a Misti although really after you've stamped off once, and have re-inked well, they stamp well.
Here is peek of my card... loved the result, like a lot of cards I had some ideas and these governed the way it took shape.
As planned on water colouring part of it, stamped about four images in mixture of waterproof Archival inks, Jet Black, Sepia + deep blue - Cobalt. Stamped one in just Cobalt, which used for main image then the others were in mixture of black, sepia and blue swiped over the stamp.
Next chose Cobalt inked image to do the sky + sand. Used a mixture of Distress Ink pads, on the sky and sea, Salty Ocean, Denim Blue, Stormy sky. For sand - used Antique Linen, Mustard seed, + little vintage photo, especially around all the corners of the image, to give it depth of field to the image.

Intended to 3D the Surfboards. As many of you know I live by the beach here, and see fair few surfboards, so when saw all cards made with this image were mostly beige surfboards I was puzzled. Mostly they've some sort of colour on it, but there are quite a few neutral ones too. Anyway these were calling for colour 😊 So that's why they have some!
Added the cut out Surfboards, shaped then glued with silicone, and front two were added on top of first lot. Once it was dry, I added glossy accents to the Surfboards, they looked like the real thing then.
I really loved this image, it was so much fun to play with it. To finish the image I dusted it lightly around the edges with DI Vintage Photo, to age the edge of card which was stark white. Then took a snippet of DP with sea words on it in lovely turquoise colour.
The corners are cut out pieces from a discontinued set from Cuttlebug called Vintage corners. I've cut the die cut done to make photo corners, as shown in image.
Stamped the Happy Birthday with Lawn Fawn stamp Set -  "So much to say" on cream card in Onyx Black Versafine Pigment ink pad, and clear embossed. Hand cut a greeting banner and backed in black card.
Wanted to make a gatefold card. Was going to do it in usual portrait style, but  the image was landscape - so made it landscape. Embossed a sheet cream, similar to greeting banner, with a favourite folder for male cards, Sizzix Dot Matrix embossing folder. Needed to extend my embossing folder - to see how to do it, look here. This was smooched with Distress ink Antique Linen, use this colour a lot. Then took a snippet of turquoise and embossed it with large embossing folder, by Embossaliscious Swirls folder. Added it to bottom and then top added image. Three black small brads on the side finished the card off.
To close here are photos from Oz yesterday, seen on our icecream drive.
 It was hot here, 39C yesterday, over 100 F, but thankfully it's cooler today and last night's storm (you can see the beginning of it in the second photo, top right) really helped.
 
Seaside summery sunset by my brother in law.

If you have time, would really appreciate a comment on my DT post here - thank YOU! 

Well, that's it for today... dont forget to pop over and join in Bec's Anything Goes January challenge .. you might win the prize :D
May the LORD bless you and those you love, wherever you might be. Thanks so much for popping over for a peek and a chat. 
Shaz in Oz.x

"Bless the Lord, O my soul: and all that is within me, bless his holy name. Bless the Lord, O my soul, and forget not all his benefits:" Psalm 103:1, 2


Joining up with:1. Word Art Wednesday - anything goes    http://wordartwednesday.blogspot.com.au 
2.#233 Any thing Goes at :  http://brownsugarchallenge.blogspot.com.au/ 
3. .Artistic Inspirations #170 Anything goes.
4. Through The Craft Room Door # Anything goes.
5. Scrapping 4 Fun #81 Bright colours.
6. Crafting By Designs # Anything goes.
(I am so over all the winter challenges, it is sooooo summery here!)

Wednesday, 6 January 2016

Word Art Wednesday Guest Designer - Jan 2016

For WOYWW post - see post below ... thank you! 

Last month I had an email from the wonderful Karen Letchworth of Word Art Wednesday Challenge asking me to be a guest designer for January.
I was actually surprised and honoured. I love this challenge and the Design Team is a great team of talented card makers. I thank them for asking me to join their team for this month :D
So here is my offering - two in all for this week.
 This was the first one I made.. I had two ideas as had to make some cards for a FB challenge too.The colours I wanted for this card wouldn't work for the challenge so decided to make two :D
The verse lends itself to a circle so a plain circle  edged with black edging used, and yellow chalk to shade it softly.  Cut a yellow *SB Shapeability Lotus Pendant, mounted it (*this year I want to use things in my stash ie hardly or unused items so here is good start on both cards).  Cut 3 Dienamics Daisies and leaves, plus leaves from a Marianne die and Nellie Snellen leaf swirl. The embossing folder is new one from trip to Brisbane craft show @ $3.95, a bargain and love it .. very different on emboss and deboss sides .. this is Debossed and it is a 5' x 7" Couture Creations Circles Folder. I extended this too. see how here.
Its been so much fun playing with these verses as so often I don't get to do this for the actual week's WAW verse.. and to do it ahead is really special, I so appreciate it.
This is the second card which I scanned a piece of DP (in case idea didn't work didn't want to waste the piece so could skip that step). Added the digital verse in Word by adding the DP image first in to a text box right size, + added verse as an overlay and printed it off high quality. I had checked the size the verse needed to be for die before overlaying it on rough piece cut out.
With the barely used SB A2 Divine Eloquence I cut the verse with a green snippet, and largest die. The saved negative part of the die was pasted for reinforcing onto a scrap piece of card, then also used on the bottom. To check out more on how I made this please look at the desk post over here.
 This is the verse this week, it is clickable for saving if you right click on it and select save. 
I wanted to share how much this verse means to me. 
As most of you know I was born with some health issues. 
It was something that as a teenager really affected me and into my twenties. I was different from my "normal" friends and younger sisters. 
I came to know the LORD Jesus when I was young - I share it in the post below or see this post here (as it's fifty years two days ago that I trusted Jesus down at our beach)
However I was so angry at God. 
He could've made a better job! He is God after all. 
Finally after about eight bitter years the LORD brought me to the end of myself, a key part in this was this very verse. 
Proud, angry, stubborn, "self-willed" me was able to say with all my heart:

"I will praise thee; for I am fearfully and wonderfully made: marvellous are thy works; and that my soul knoweth right well" Psalm 139:14

I know now - God doesn’t make mistakes. As Romans 8:28 says:
 "ALL THINGS work together for good to them that love God to them that are the called, according to His purpose."
His purpose note,  not mine.
His ways are always best.. 

Hard? yes, not easy, but best - do we want second rate?

Well, thanks for popping over - and staying for a peek and chat.
May God bless your day where ever you may be. 
Shaz in Oz.x


Linking up to:
1. Di's Snippety challenge - Used  a number of snippets on both cards http://pixiescraftyworkshop.blogspot.com.au/
2. Word Art Wednesday - anything goes    http://wordartwednesday.blogspot.com.au
3. Our Daily bread challenge - Use old and new, first card - old SB circles and Shapeablitiy and new EF.
http://ourdailybreaddesignsblog.blogspot.com.au/2016/01/odbdslc269-something-new-something-old.html

Tuesday, 5 February 2013

Upcycled Christmas Cards again!

Hullo there everyone - here is yet another of the up-cycled Christmas cards - made from shop bought cards received. Again you end up using colours and designs which you normally would not use! love it!
Not a before and after shot with this one (forgot). 
 Had nice side border but did not look right with this trimmed top edge. I did not like the greeting on this card so have not used it, this greeting already stamped in stash; wanted to use these brads for ages, nothing suitable up to now!! 
The ribbon was also a snippet, reject off another card. Embossed card is Cuttlebug 5x7 Holly and ribbons, also rejected when doing another card. 
If had decent gold bling would have added it to poinsettia but dont have it. 
Isn't funny how gold bling is always yellow really?  and fussy me, would rather go without than add it, on this card anyway. So many Snippets - so off to the play at Di's Snippet challenge for me!!
This card is made in the same format as the ones HERE on this post - where I used a card received for Christmas ( hand made from fibres in Rwanda) and used the image as a digi image. I really like it with this Cuttlebug Gracie's Frame folder - had to extend it (to see how to do this LOOK on this post HERE) to get it to work the way I wanted. 
(And over at Hazelnut's, Christmas Challenge she is looking for Christmas cards that have "P" in them. Mine is "P" is for Peel-offs ~  in the greeting!! :D
 PLUS  Hazel's EXTRA Challenge for February!) and Pretty little Ribbon Shop blog - Anything goes. 
Sometimes I wish I could design embossing folders .. they just dont make them the right size in my books.
I am not sure what is standard in US but it is not standard here .. guess we dont win that one!!
Thanks so much everyone for popping over for a peek and chat - and my our dear LORD bless your day wherever you may be.
Shaz in Oz.x
PS Big welcome to the very new Encourager on my blog - Andrea of "I would rather be Stamping", and how I agree!! 
and also my Black + Yellow card for OSA won top three over at Stamping Sensations - woo hoo!  I am not good at entering challenges, and then when I do, I mostly forget to check! really dont know how others do it!

Sunday, 27 January 2013

Brayered Stampscapes Card

{Calligraphy - Illuminated text in post above}

Hullo there everyone!!
Way back I actually brayered these backgrounds and showed you how I make these brayered backgrounds. 
Then a another video was made stamping them using these stamps, but we forgot to check camera was still in right spot. Half of it was off screen so I never uploaded it. 
Finished images were on my WOYWW desk a few times (see HERE), and now here they are at last in cards!

Card for Mrs A. as special thank you, from draw on Dec. 1st 2012 when drew a thank you draw to thank my Wonderful Encouragers, for being that - Encouraging!She kindly waited till I was well enough to make it ( I know she has received it now). 

First time used the stamp and used it as an overlapped image. It was not large enough for brayered background. (See the second lot of rocks on right of image; I have overlapped the stamp just near that) The trial piece here shows it better .

It was shown on the one Kevin's posts  .. he owns/ designs Stampscapes. He has quite a few videos on scene building - check them out!

Here is his first video called Seamless Scenes. Try this link if it does not work.
A card for Bernie, as a special "Thinking and Praying for you" card.
Funny isn't when you go to do a card you cannot quite find the right words for greeting? Thought I had plenty till making this card above {Note to self: Look for better small ones, plenty of big ones} .
I really love these scenes and  dont think possibly Panpastels (the little I have used them), they will ever beat the brayer for clear crisp pop out scenes. Partly because of the high gloss paper upon which you brayer - Kromecoate is best. I think that this is because you use different paper too not just the medium itself.
Just in case you missed the video for the background with brayer look on this post here as it has video plus whole lot of tips to brayer well.
 
Or try this link if it does not work - HERE.

Thanks so VERY much for popping over for a peek and chat, and may God bless your day wherever you may be!!
Shaz in Oz.x

Saturday, 20 October 2012

Stampscapes ~ More Lakes for Finland!

Hullo there every one!
Way back here on this WOYWW post - see here, I showed you the beginning of this Stampscapes card ( stamps are - Lakeside Cabin small 147F, Gulls 302A, Reeds 067B)
Sunset is with brayer work and Stampscapes images ~ done with the colours of Adirondack that Sandy Hulsart used on her You-tube video (now deleted), to see how it is done see my video at the bottom of this post.(inks are Purple Twilight, Mountain Rose and Peach Bellini)
Also I showed how made the framed corners, on this WOYWW post HERE, with Fleur De Lis square Spellbinders in black card, cut largest die and then separated into four.
The embossing folder is supposedly called "Ripples" (but not found anywhere online, so no idea really - any ideas out there?).  
{Edit added: -  is called Japanese Scales and based on a typical Japanese pattern - thanks Anne :D, sending big blog hugs, see in comments!}
I bought it on eBay, it was listed as "Ripples". I didn't know it hadn't a cover and thus proper name on it (it had it in tiny print on eBay listing) - I really like to have them. It has Cuttlebug stamped on it, nought else.
Printed the greeting first of all on the computer
I extended the embossing as usual, and double scored at base of embossing. 
Coloured edge of purple card to match with the Purple Twilight, as had none to match it.
I would like to enter it in the following challenges (apart from Di's above):
1. Charisma Cards Challenges  -  Clean and Simple
2. Cards Galore Challenges - Anything Goes!
3. Simon Says Stamp Challenge - Favourite things.
Spending time with family and friends is definitely a favourite thing; to be in this place (see below) was rather a dream. Plus adore this Stampscape image it is favourite stamp as my blog posts show shows!!
This card is a thank you to send to the folks in Finland. My family and I stayed with on a visit there. They're great friends of family and the time chosen to catch up happened to be while I was over.
SOOOO they took me over as a great BIG surprise!
I found out the night before we were to fly out to Helsinki to stay with them on the lake (hence the Lakeside card). We arrived at midnight their time (think it is two or three hours behind UK) and it was like a magic place as there was still snow on the ground in parts. That seemed too incredibly exciting to me! God was very good to me and my family were incredibly kind, as were the folks with whom we stayed!

I will share you a few of the magic shots of God's glorious creation down below, so you can see how beautiful it was - this was mid April and first day was 7C max but second day was 15C, and so lovely!  
They made us so welcome - I loved it.
This was the only fish caught that day, when Rob and Bastion went fishing! they had me tricked - I thought it was a fish till they landed it! yes, the water was still partly icy...but melting.
Some flowers on my walk- aren't they beautiful?? it was spring time :D

Sun setting on the lake, one of the 188,000 in Finland - near  Vihti.
And the night sky!! WOW - I finally saw a decent night sky.
Here in Oz, we are so very blessed to see these awesome starry nights all the time.. so sparkly and bright compared to yours in UK. 
However up to this point had seen some only one night in Manchester - that was in three visits of five weeks per visit!
Such and awesome time - wont say how many photos I took, but show just a few!! my first trip photos, apart from WOYWW ones are over here!!
Thanks so much for popping over for a peek and chat, and may God bless your day wherever you may be!
Shaz in Oz.x 
PS. I want to welcome my latest Wonderful Encourager, Aussie Annie, see her blog here! Annie, thank  YOU so very much for encouraging me and making my day! :D
PPS. Oh and Di, card was made pre-op in case you think these are super quickly recovered eyes :D and post done mostly before too..
To see how I made the background for this card, you can see it here:

Sunday, 9 October 2011

White, silver and a touch of purple - Wedding Card + Cards for Debby

Hi there everyone. Well here is the card which I promised you on Wednesday - and to the WOYWW-ers among you, I am just letting you I may not be around this Wednesday. Hope to catch up with you all on 19th all being well.

This week is the last lesson of my calligraphy students and hope to have heir final projects to show you - God willing!
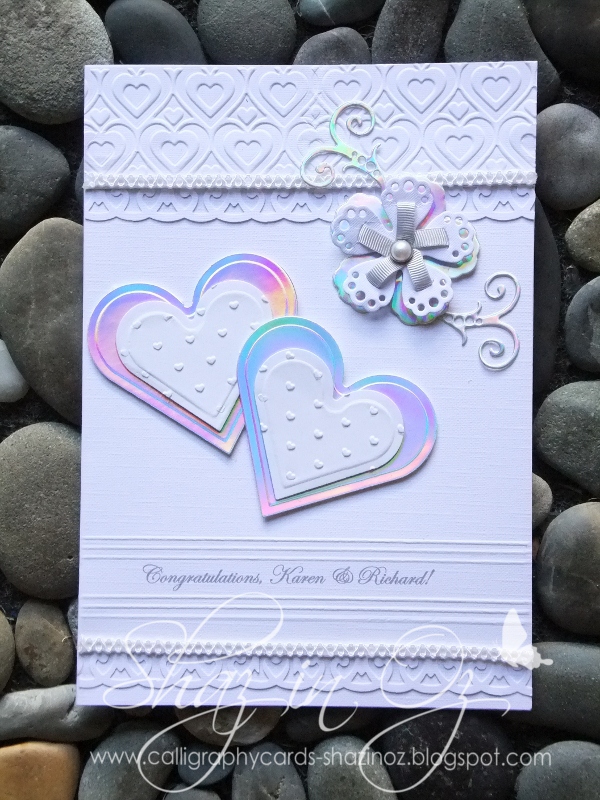
As I said on WOYWW post I was asked to do a wedding card in white, silver with a touch of purple by a very special friend.
I am also going to enter it into the Anything Goes Challenge blog for this week as the challenge is for Challenge 51 - Die cuts/ Punches or both.

Now to the recipe, used the Cuttlebug folder Swiss spots, and it was extended it a little (check post on this if you want to know how). It was scored a couple of lines to have a plain section for bottom of card. Used Mirri card from UK and Fleur de Lis Spellbinder Medallion for two main parts of the centre pieces and the tiny flower centre is from Spellbinder Flourish set. The alphabet was Cuttlebug Olivia and the labels was from Fancy tags 3 set, and Petite ovals - second smallest die. I used the tiny pearls from the Nestabling that matches these sets. However I did not like to when I overlaid as it is meant to be, as it hid all the purple underneath.

Hence I decided to do the very tedious thing of hand dividing them. Placed them one by one with ultra fine tweezers around the Petite Ovals die, and extending pearl double loop to outer as it was meant to be. If you can't understand what I mean let me know, it is hard to explain. Also added other pearls to corners and various other sections of the die cut outs, and silver ribbon.
Thanks for popping over, and may God bless your day wherever you may be!
Shaz in Oz.x
PS. Please if you have time, send a card for Debbie see below. I plan to send one from stash this week, God willing - see link on top of sidebar or also with details pasted here:

"Friday, September 2, 2011 

Smile 4 Kids blog


Please help us Shower Debby with Thoughts and Prayers and Cards

About a month ago, one of our SAS4Kids team members, Debby Walker, was in an accident and sustained severe head trauma. After she came out of her coma she has had amnesia. She is slowly remembering things including how much she loves stamping and being on her design teams.  She is having motor skill issues as well and has started physical therapy.
Let’s shower her with thoughts and prayers and cards and let her know all of us are wishing her well. Here is her address:
Debby Walker
1805 Brownstone Blvd #301
Toledo OH 43614
I know stampers and crafters are giving and loving people and I hope you can take the time to send d Debby a card- just say you are an on line friend from Send a Smile 4 Kids.
Stamping smiles for Debby, 
Karen."

Friday, 10 June 2011

Lili Of the Valley Challenge 100 Anything Goes

I have looked at this bride and groom image from Lili of the Valley many times and longed to have it and when I finally decided to do an order it was sold out!! so had to wait for it to come on sale again and used the wedding greeting from Lili of the Valley greeting set too love this set as well.

I used the Budding Vine embossing folder from Crafts Concepts and extended it using my method. Olivia Cuttlebug alphabet for initials of bride and groom - this was for my friend and I coloured the images in with my Promarkers and also using the Dovecraft Pearl chalks. I really love this soft colour combination. Used couple of scored lines on lien cardstock, my Taylor die for the edge, some braid and some pearls for simple adornments, my friend Steph was very happy with this.
I am entering this card in the Challenge 100 Anything Goes of Lili of the Valley - this is the first challenge I have entered for months, and if did not have to do this card anyway would not be entering! Really love this stamp!
Thanks for looking and may God bless your day wherever you may be,
Shaz in Oz. x

Wednesday, 1 June 2011

WOYWW - What's On Your Workdesk? Wednesday 104 - 2nd Anniversary time - YAY!

Ah, the big day of celebration has arrived! Tis here!!
  I would dearly love to say one BIG thank you to our glorious, royal hostess of this marvellous event - What Is On Your Workdesk Wednesday, Queen Julia. Her faithfulness to the task over two whole years is amazing and worthy of much commendation!


I only joined this blog hop January 12th , 2011 as I am only a new blogger, but have learnt so much through this weekly blog hop and really want to thank all concerned! Like Jude and my loose screw (no, not in my head…the Cuttlebug :D) and Susan for sorting out my Nesties with magnetic tape, and Shazsilverwolf and her Aspire cards which I am now hooked on - just to mention a very few!

Now my desk has been sadly neglected this week. I seemed to spend the week at doctor’s, specialists’, and Pathology waiting rooms – doing a medication change. Never popular with me, but God willing all is well! So here is the little bit I have done this week. None at all on my two Calligraphy projects, but one card is being assembled on the desk this week.

Here is the card finished. It is an engagement card a printed computer generated greeting,  it has Nestie hearts, Cuttlebug heart folders (top border is Kimmy Luvs and other is Love Duo, discontinued now), Marianne flower dies and ribbon flowers – I really love them.
TIP: if you have trouble with them coming out of Marianne dies I have found spritzing the card with water (hence the mini Mister on the front foreground) really works a treat! (first read on Ikki's Cuttlebug Cupboard)
I really like the Mirri card with the hearts and flowers. Have to make two more cards as well so better get my act together - now off to check out all the other desks (when the rest of the world wakes up) – do join in our weekly peek and come with me to Julia’s beaut blog -  Stamping Ground

Happy second anniversary every one and may God bless you wherever you may be!
Love Shaz in Oz.x

Wednesday, 13 April 2011

What's On Your Workdesk? Wednesday 97

Well, here we are fellow WOYWW-ers! back at another review of work-desks on a Wednesday and for those of you who are wondering what I am muttering about - join in the fun by checking out our royal hostess'  Queen Julia's glorious blog at Julia's Stamping Ground!

Here you will see my desk is littered again. There are some completed cards to the top right. To see these and also the terrific Fat Cats Competition [with three $100 AUD vouchers to be won! -wohoo!] see here .

Also I'm playing with some glimmer mist Jazz Blue and cosmic shimmer Silver having read Brenda's Blog - Floral Fantasies and her workshop on mixing them. I ordered these two new colours to have play and I am hooked!! Thanks B.! if you want to see it look here for her helpful tutorial . I like the Cosmic shimmer better for for its high shimmer but think the Glimmer mists lighter glimmer has place too according to what you need so mixing the two is good.

The embossing folder embossed above in white is one from Fat Cats (which I have extended using my extended method to double the length - see here or sidebar labels if you dont know how to do this). A new one called Leaves & Butterflies K Kingdom Embossing folder 129, which has small embossed butterflies on it. Since I was also sent the Creatables Butterflies from Marianne I am hope to make some butterflies with the spare card I have coloured as well. I have used silver Cosmic Shimmer and Jazz Blue in Glimmer Mist.

Happy WOYWW everyone and may God bless you wherever you are..
Shaz in Oz.x

Thursday, 10 March 2011

The Fragility of Life - A challenge!

Challenge #79 Stampin' Sisters in Christ.

Scripture: Isaiah 40:8 "The grass withereth, the flower fadeth: but the word of our God shall stand forever."
  This is a beautiful thought - life can become overwhelming at times, and "What is our life,  it is a vapour that appears for little time then vanishes away", as James said in his New testament letter.
James the Apostle was a wise man.. life will soon be past!
May we leave behind a pleasant and beautiful fragrance with all who may come across our path this day that the LORD has given us. Our God's word living in our lives will never fade or pass away!

Challenge: Use a stamped flower image on your card/project (note that patterned paper, embossing or paper flowers do not count as a stamped flower).


Recipe for these two cards:

1. Entry for the Challenge is the first card. . The two images on both cards are stamped with Stamp of Lily - Printblocks I-2022 (Brisbane, Qld firm, from 1990’s).
White cardstock mounted with Big W red cardstock, then, flower patterned from Ripe Razzle berry set by Stampin’ Up. It was edged with the Nellie Snellen Lace edge die.
Using Large labels I cut the Lily out, mounted on same red then on patterned paper from Stampin up Ripe Razzleberry. As stated on my last WOYWW post (see pictured here too) I used Primsa-watercolour pencils, and I enjoyed using them. Then sprayed it with Diamond dust Glimmer mist. I then stamped the ODB greeting at the base I like this as it covers many things. Birthday, encouragement, get well and even sympathy if you wished
I added the few pearl adornments.

2. Card with red embossed background, mounted on white cardstock. Background is Big W. red cardstock was cuttled with Moroccan screen, and the surface embossed with white chalk pad. The Taylor Eyelet Die was used to border it, along with the soft white cotton lace. Both background and edge were done with my extender method – see enlarging Cuttlebug folders here is one of them, check sidebar for more! and I do the same with border dies. I used Labels two for the stamp cut out this time and then the stamp treated the same as above, all the way down to pearls except lightly different.

For those of you who comment on my stones, this is stone mat at my courtyard door , a birthday present last year from my youngest sister. I started taking the shots there because mainly it has great natural light and thought the stones look okay. So it is something you could make yourself! If you want to know how just ask me by email click on my profile and email address is there...she is kind clever sister!

May Our God be with you through your day wherever you may be till next time,
love Shaz in Oz.x

Wednesday, 16 February 2011

What's On Your Workdesk? Wednesday 89 + Our Daily Bread Challenge x 2!

Well folks, here we are again! 
I did my calligraphy post as promised for last Friday you can view it here. : D , and now  I have been busy doing a couple of friends birthday cards (I seem have quite a few of them and there is quite a run of birthdays!!) And you cant see Nesties on this table 'cos they are tidied away.. and thanks to all folks who tipped me off on Nestie storage, I have bought the magnetic tape. A big thanks to Susan  @ Stamp on Me my Nesties are all nestled in their home nice and tight NOW! She told me in her comment of the magnetic tape you can buy from Spotlight so off I went and now they are all fixed up nicely.


 Once I complete two more birthday cards I will have to have break from cards and do some calligraphy and also do a chart for our church group I go to, I do one each year. It takes a few hours work, I have to print the photos off for that as well,.
Now today’s table shows some work being done - in right hand top-corner you can see I was playing with foil and embossing it and trying out method of colouring mostly without much success, the foil was strong sort, from a lid off a yoghurt container. Last week on WOYWW RosaC of Paperchase  told me she used metal wrapper saved from some bubbly bottles and put through the Cuttlebug. Not using wine myself I asked my family to save it for me, but they said no, in Oz we have gone over to screw tops as it seals much better than corks and foil. Mmm! So next best thing I came up with was the yoghurt top! The Perfect Pearls coloured it very well, as pictured in lovely turquoise, and so did the Rub On gold - see small squares on the half completed male card, but rub on gold was very messy to do, (the card is now finished and looks great will post later)...
My purple toned Distressed card ( posted below), is a challenge entry for OurDailyBread ODBDSLC47 "Have a H.E.A.R.T." recipe and also an entry in the Our Daily Bread Designs Stamping In Time: On Assignment Challenge(SNTODBD28). The latter simply required to be distressed in some way and is made for someone who has been through stress. (Tick! times two!)
"Have a H.E.A.R.T." recipe.  You must use three of these ingredients.
H= Hemp
E= Embossing (tick)
A=Any Our Daily Bread Images or Sentiments (tick)
R= Ribbon or lace (tick)
T= Tearing or distressing (tick)


My card was not as distressed as I planned, ‘cos I was so stressed over not cutting mount straight and der! I forgot to stress edges with purple ink on pale bubbly background sheet, rather an irony that! :D
However I did distress the white core dusty mauve paper with the Cuttlebug Daisy pattern on it, so white daisies showed through. I like my new Stampin Up distressing blocks; they work wonderfully well. The card was to be made for someone who has felt the stress of life and my dear Jen really qualifies in this!
In case you can’t guess Jen loves purple, bling, flowers and ribbon (it is purple, but photograph looks pink!) so she had to have all four, of course. And I also used the ODB verse on the marbled brayer piece I did a few weeks back, see here if you want to see the method of marbling with brayer. So guess there is a bit more distressing there!
I used wavy rectangles in my Nesties and figured they were a good distressed shape too! 
 
 My other friend whose birthday card I have posted here as well loves pink and so I have used one of my teabag folding pieces. I love this one, cos it has gumnuts and gumleaves on it (found a sheet of Australian native flowers for teabag folding ). As Steph calls me Gumnut,  I thought it makes it doubly appropriate. The corners are Vintage corners from Cuttlebug, and the outer centre is my Blossom Nestie cut twice in different colours and interlocked and then another scalloped circle on the bottom, The Cuttlebug folder is “Kimmy Luvs".
Oh and to the observant among you, you will notice I have acquired a new watermark... thanks to Jocelyn for her wonderful emailed instructions which helped in applying it with Gimp (a free download) and to  Karen Giron a lovely design for very low price. Thanks so much ladies, not being really cluey on these things it is handy to have web friends who help you so wonderfully. God is good.

Oh and to join in the fun of WOYWW, make sure you drop by Julia's Stamping Ground! 

See I am learning lots of things with my weekly visits, and as I was told, warned, etc - it IS addictive! 

Oh and look see! my brand new ATG gun has just arrived, now off to play! yee harrr! 

Big thanks to Susan Maloney and butlersabroad Brenda of  WOYWW fame! 

Brenda told me Susan had one for Christmas sent to her here in Oz.. Susan told me where she had bought hers from a few weeks back.... ah, sooo spoilt! thanks to all, everyone etc, you are so much appreciated!!
Related Posts Plugin for WordPress, Blogger...